
Concealer placement for beginners helps you apply concealer in the right places so your makeup looks brighter, smoother, and more natural without feeling heavy.
Concealer Placement for Beginners – Easy Tips for a Flawless Finish
Concealer placement for beginners should feel easy, not overwhelming. This guide shows you where to apply concealer for a smoother, brighter, more flawless-looking finish.
Concealer Placement for Beginners Starts With Less Product
Concealer placement for beginners can feel tricky because it is easy to use too much. Concealer is usually thicker than foundation, so a little goes a long way. When too much is placed under the eyes, around the nose, or on textured areas, it can settle, crease, or make the skin look heavier than it really is.
The goal is not to paint large triangles under the eyes or cover the whole face with concealer. The goal is to place small amounts only where you need brightness, coverage, or balance.
Chele’s concealer rule
Place concealer where you want correction, not everywhere you see skin. Small dots blended well usually look softer than thick layers spread across the whole under-eye area.
Where to Put Concealer Under the Eyes
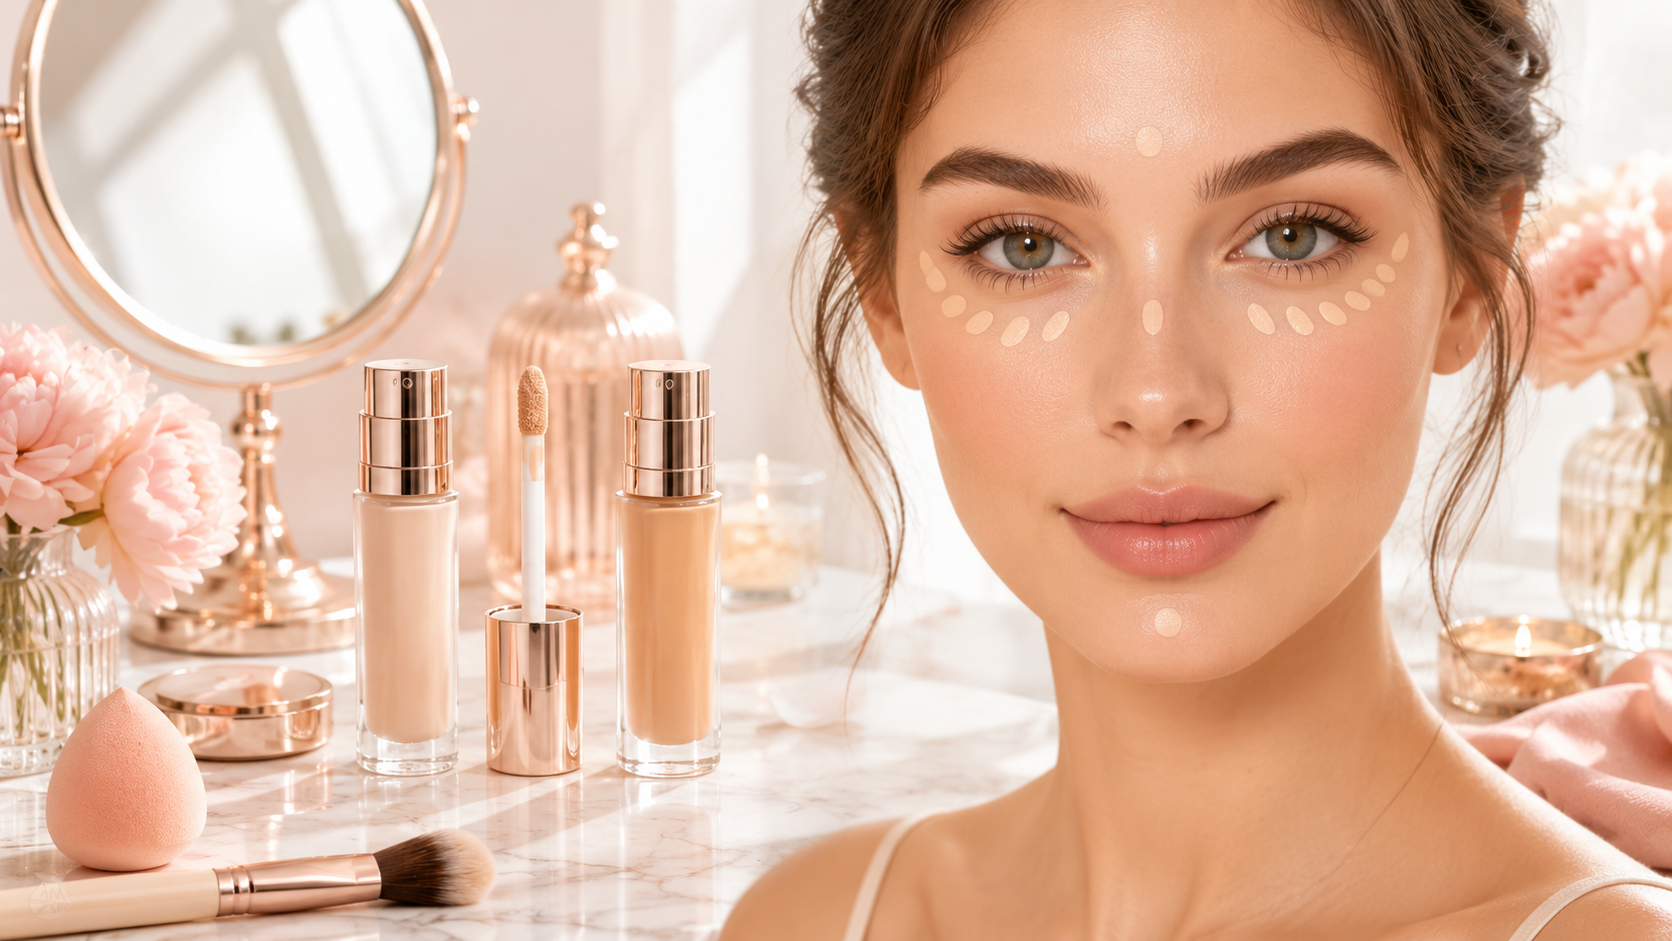
For under-eye concealer, start with two small dots or short strokes. Place one near the inner corner where darkness is usually strongest, and one slightly lower on the outer under-eye area if you want a lifted look. Then blend gently with a sponge, brush, or fingertip.
Avoid taking thick concealer all the way up to the lower lash line unless you truly need coverage there. The skin under the eyes moves a lot, so product placed too high or too thick can crease faster.
Concealer Placement for Redness
If you have redness around the nose, cheeks, or chin, place concealer only on the red area instead of covering the whole section. Tap the product in thin layers. If you rub too much, you may lift the product back off.
A shade that matches your skin tone works best for redness. A very bright concealer may make redness look gray or obvious, especially around the nose.
Use tiny dots near the inner corner and outer under-eye area, then blend softly.
Use a skin-tone shade to soften redness without creating a pale ring around the nose.
Use a small brush and tap the concealer directly on the spot instead of spreading it around.
Use a tiny amount only if you want brightness through the center of the face.
Concealer for Blemishes
Blemishes need a different approach than under eyes. For blemishes, choose a concealer that is close to your foundation shade or skin tone. A bright under-eye shade can make a blemish stand out instead of hiding it.
Use a small brush or the tip of the applicator to place concealer directly on the blemish. Let it sit for a few seconds, then tap around the edges to blend. Try not to swipe back and forth, because that can remove the coverage.
Should Concealer Be Lighter Than Foundation?
Under-eye concealer can be slightly lighter if you want brightness, but it should not be several shades lighter. If it is too light, it can look stark, gray, or obvious in photos. For blemishes and redness, use a shade that matches your foundation or skin tone more closely.
A good beginner setup is one concealer close to your skin tone. Later, if you want more brightness, you can add a slightly lighter shade just for the under-eye area.
How to Blend Concealer Without Making It Heavy
After placing concealer, give it a few seconds to sit. Then tap it into the skin instead of dragging it. A damp sponge gives a softer finish, while a small brush can give more coverage. Your finger can also work because the warmth helps melt the product into the skin.
The key is to blend the edges, not wipe away the center. Keep the coverage where you need it, then softly fade the edges into the rest of your makeup.
How to Set Concealer Without Looking Dry
If your concealer creases, use a very small amount of powder only where you need it. Too much powder under the eyes can make the area look dry or textured. Tap out any creases first, then use a small brush or puff with a light layer of powder.
If your under eyes are dry, you may need less powder, not more. You can also use a lighter layer of concealer so there is less product available to settle into fine lines.
Concealer Mistakes Beginners Make
- Using too much concealer under the eyes.
- Using a shade that is too light for blemishes.
- Dragging concealer instead of tapping it in.
- Putting concealer everywhere instead of only where it is needed.
- Using too much powder over concealer.
- Blending so much that the coverage disappears.
Quick Beginner Concealer Routine
Start with foundation or skin tint first if you are wearing it. Then look at what still needs help. Add a small dot of concealer at the inner under-eye area, a little around the nose if needed, and a tiny amount on blemishes or discoloration.
Blend by tapping, not rubbing. Set only the areas that crease or move. This keeps the face looking fresh instead of covered in too many layers.
Final Thoughts on Concealer Placement for Beginners
Concealer placement for beginners is not about covering the whole face. It is about using small amounts in the right places so the face looks brighter, smoother, and more balanced.
Start with less product, choose the right shade for the job, tap instead of rub, and set lightly. Once concealer is placed softly, the whole makeup look feels easier and more natural.
For general cosmetic safety information, you can also visit the official FDA cosmetics information page .